


Planning your data with Tresio helps you make well-founded decisions based on your individual situation, your goals, and your personal risk tolerance. It serves as a kind of roadmap for your finances. In addition, Tresio’s tools give you a clear visual overview of your financial development and help you spot trends and patterns early, making your planning even more precise. This type of planning helps companies anticipate different scenarios, avoid financial surprises, and align different business areas efficiently.
Setting Up Your Planning Data
Planning data represents a company’s income structure, showing expected inflows and outflows. You can set up an unlimited number of planning elements per company and scenario.
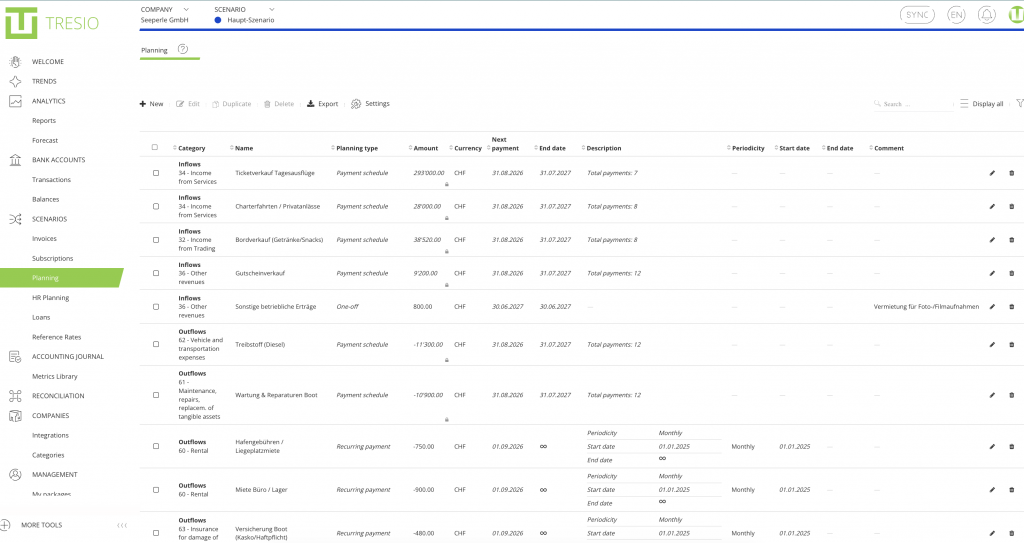
What’s shown in the Planning module:
- Category – the category type from the chart-of-accounts structure, with expandable subcategories assigned to your company. Without an assignment, an element appears under “Unclassified.”
- Name – the name of the planning element.
- Planning type – the planning type determines how the amount behaves over time. There are eight types to choose from. Details on each type are covered in the next section.
- Amount – the amount of the planning element.
- Currency – the currency of the planning element.
- Next payment – the next due date for recurring entries or payment schedules, taking each individual amount into account.
- End date – defines when payments end. This is optional; without an end date, the element continues indefinitely (shown as “∞”).
- Description – an extended description of how the element is set up, which varies depending on the selected payment/growth type.
- Comment – an optional field for additional internal notes about the payment.
Setting Up a Planning Element
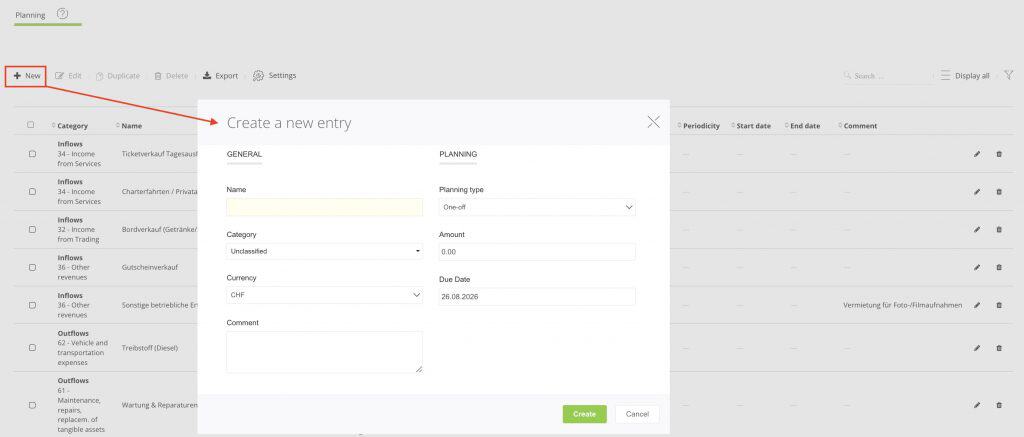
To set up a new planning element, click the New button. In the “Create a new entry” window, fill in Name, Category, Currency, and Comment under General. Under Planning, select the appropriate type; the remaining fields adjust automatically based on your selection.
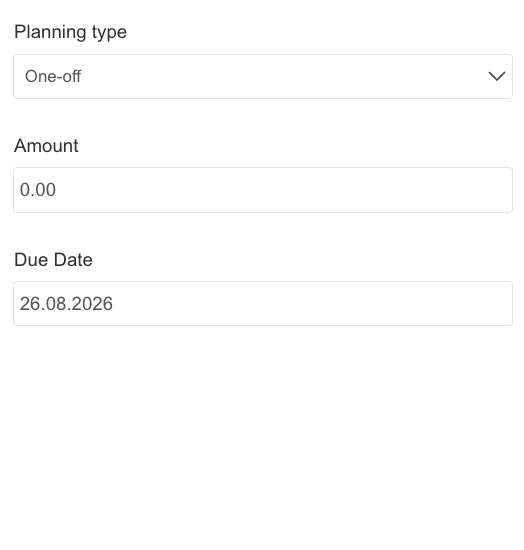
One-off
A one-time amount with a fixed due date. Example: a one-off machine repair due on September 15.
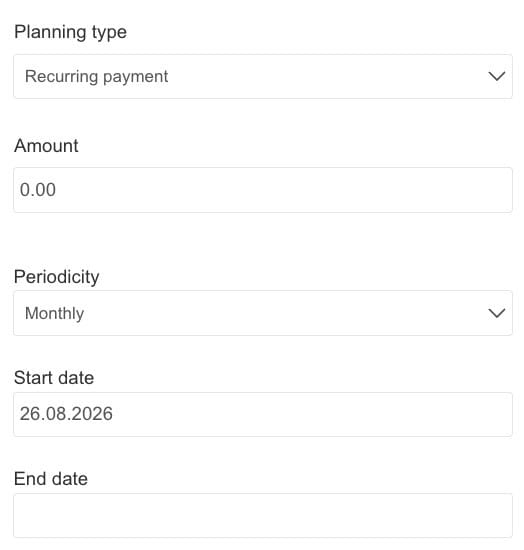
Recurring payment
A fixed amount that repeats according to a payment cycle (e.g., monthly) between a start date and an optional end date. Example: monthly office rent of CHF 900.
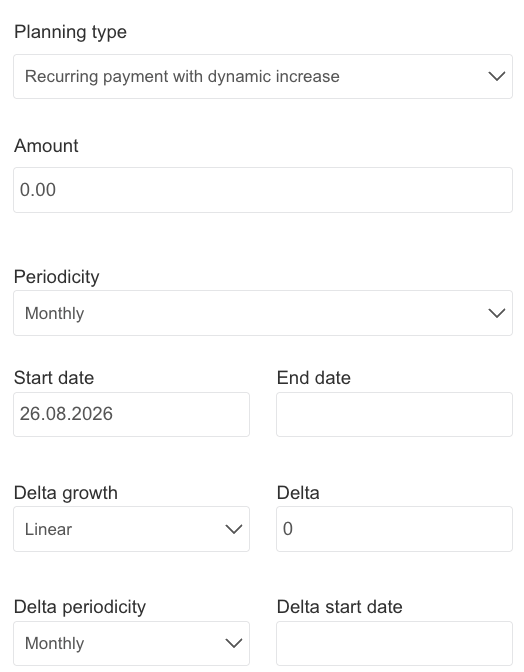
Recurring payment with dynamic increase
Like “Recurring payment,” but the amount also increases incrementally over time. Use Delta growth to choose whether this increase is calculated as a fixed amount (Linear) or as a percentage (Exponential); Delta, Delta periodicity, and Delta start date determine the size, rhythm, and starting point of the increase. Example: a salary that increases by 2% each year.
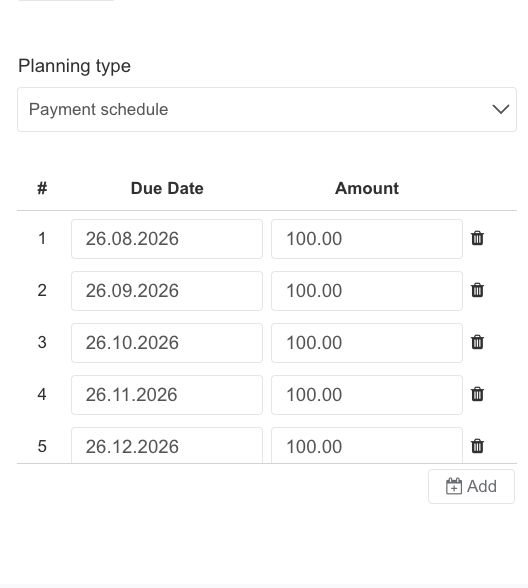
Payment schedule
A freely definable list of individual due dates, each with its own amount, which can be extended as needed using Add. Example: an invoice settled in four instalments of different amounts on different dates.
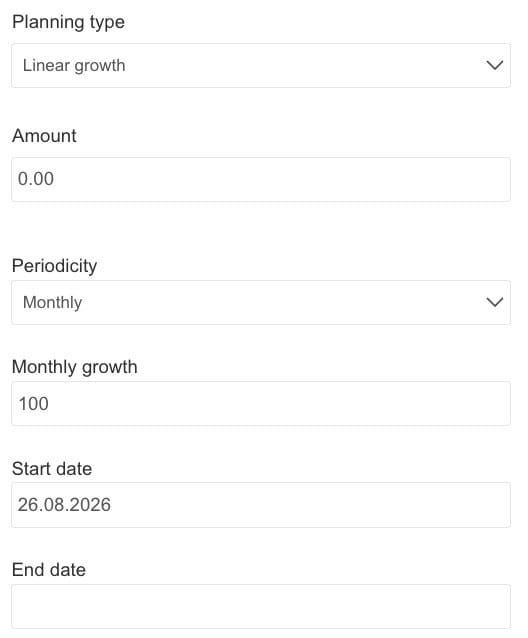
Linear growth
A starting amount that increases by a fixed monthly growth amount. Example: a revenue forecast for a new offering that grows by the same amount each month.
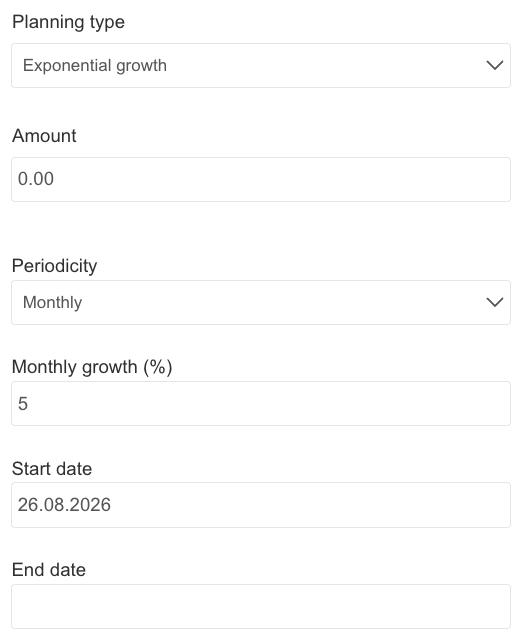
Exponential growth
A starting amount that increases by a percentage-based monthly growth rate. Example: a revenue forecast for a growing business area with a constant percentage growth rate each month.
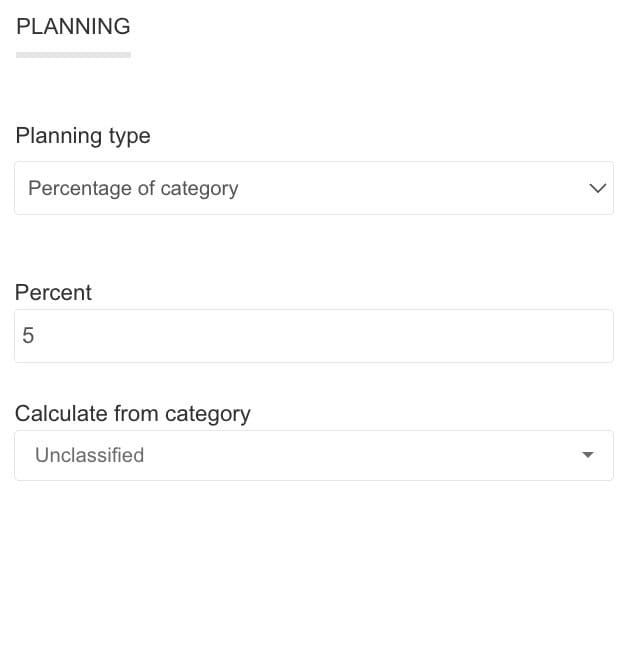
Percentage of other element
The amount is calculated as a percentage of another, already existing planning element. Example: a sales commission that is always 5% of planned ticket sales — it automatically rises or falls together with that one product.
Percentage of category
The amount is calculated as a percentage of an entire category. Example: cost of goods that amounts to 30% of all planned sales revenue, regardless of how many individual products make up that revenue.
Editing, Duplicating, or Deleting Elements
There are several ways to edit elements.
You can edit or delete individual elements using the pencil and trash-can icons, or select multiple elements using the checkboxes and edit, duplicate, or delete them together.
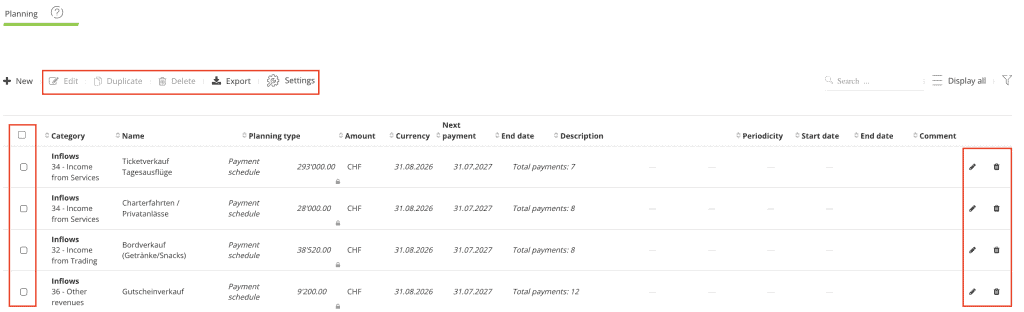
Using Export, you can export your planning data as an Excel or CSV file, output it as a PDF document, copy it to the clipboard, or print it directly.
The Comment field does not support special characters such as apostrophes, semicolons, or line breaks (the Enter key), which can cause display issues. We recommend avoiding these characters when entering comments. If a display error does occur, you can fix it by removing the special character causing it.
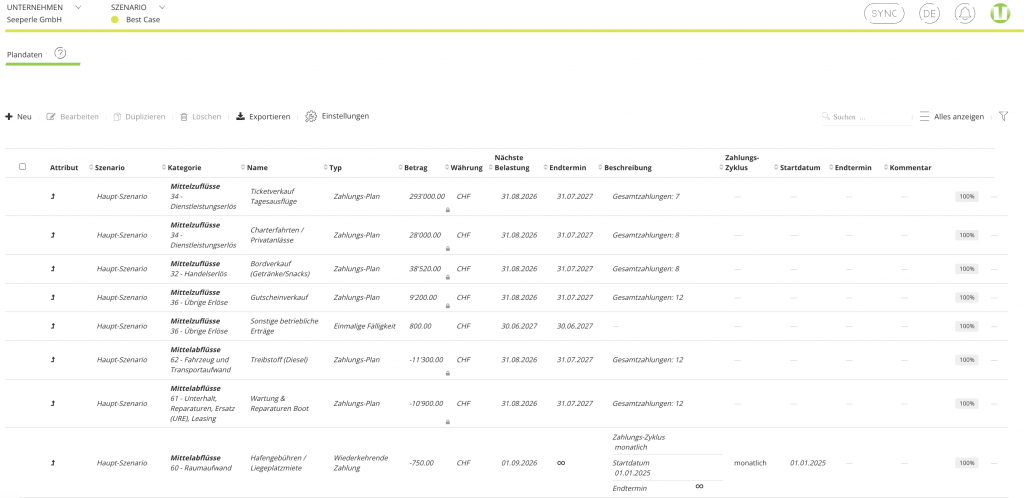
Please note: for a “child” scenario, planning elements are inherited from the parent scenario. Users cannot edit them directly — they can only adjust them as a percentage. In the table view, this adds extra columns (Attributes, Scenario, and a percentage column on the right, set to 100% by default). If a child scenario needs additional elements of its own, these can be added using the New option. You can find a detailed description of scenario planning here.
Viewing Your Elements in TRENDS
Your planning data automatically flows into TRENDS, where it is listed by category, from the parent category down to the individual planning element.
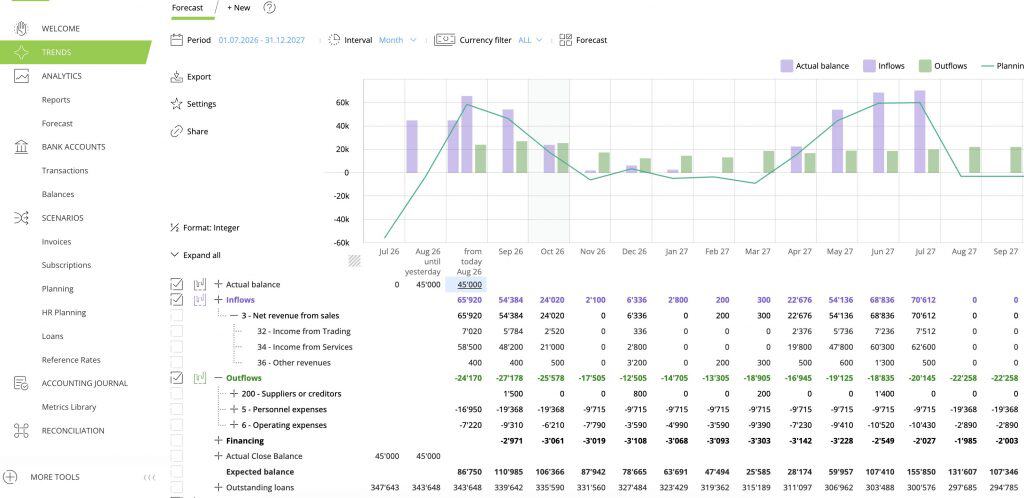
How detailed your planning data appears in TRENDS depends directly on the category you’ve assigned to each element: with a fine-grained category assignment, you’ll see individual line items down to product or service level; with a broad assignment, you’ll only see the total at the parent-category level. It’s therefore worth choosing the category deliberately when setting up a planning element.
For details on how to use the TRENDS view, adjust periods and views, and break down individual figures, see the article How to Use Tresio TRENDS.
Creating and Managing Personal Views Using Filters
Click Display all to open a menu with different data views. Each view shows a different selection of columns to highlight the data relevant to that view. You can create your own view at any time using + Add new view.
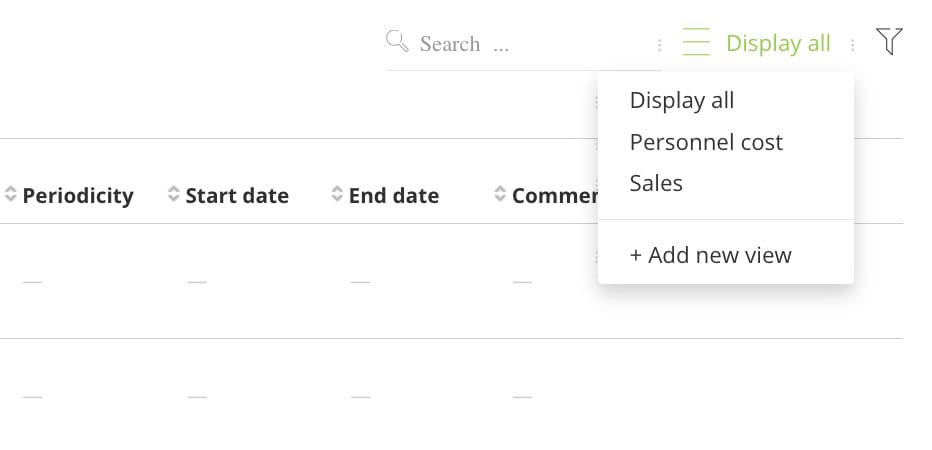
For details on how to set up and manage your own views and filters, see the article Workspace Filters.
If you’re interested in learning more you can watch our tutorial video.