Payment reconciliation is a critical aspect of financial management, ensuring that an organization’s financial records accurately reflect the payments it receives. TRESIO simplifies and accelerates payment reconciliation, offering efficiency, timeliness, and accuracy in financial management. With the ability to manage payments up to yesterday and automate the loading of new payment events, TRESIO empowers organizations to maintain a strong financial position, comply with regulations, and make data-driven decisions for long-term success.
How to read your reconciliation data
TRESIO’s reconciliation tool lets you track your unpaid events by working like a checklist; enabling you to go through and mark off any outstanding payments to ensure they stay on your radar. The reconciliation screen enables automated collection of payments sourced from the HR Planning, Planning Data and Subscriptions. All payments are initially loaded as ‘Unpaid’, and users have the flexibility to mark them as ‘Paid’, ‘Paid partially’, Unpaid,’ allowing for real-time financial insights into their organization. The system only loads new payment events daily and does not update previously loaded payments.
The Reconciliation screen is not displayed in the left-side menu by default, and you will need to ‘include’ it in the menu from the ‘more Tools’ screen.
Please note that if the ‘due date’ of a payment is modified after it has been loaded for reconciliation, the system will include the updated payment on the liquidity Forecast screen.
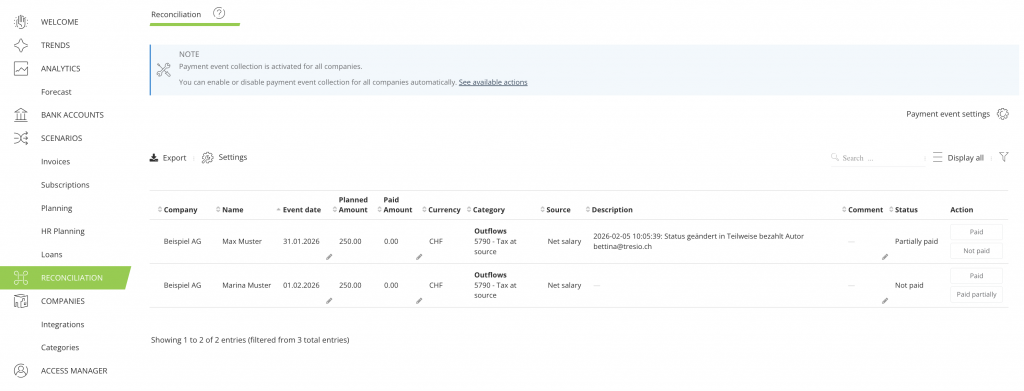
What the Reconciliation screen shows:
- Company
- Name – Name of the payment source
- Planned amount – Amount of the payment event
- Planned date – Due date of the payment event
- Paid Amount – Amount already paid toward the payment event
- Currency – Payment currency
- Category – Category of the cash inflow/outflow assigned to the payment
- Source – Designation or origin of the payment
- Description – Description of the payment event
- Comment – User comment
- Status – Current payment status
- Action – The user can manually mark a payment as “Paid”, “Partially paid”, or “Not paid”
You have the option to print or export your payment details to PDF or Excel using the corresponding buttons.
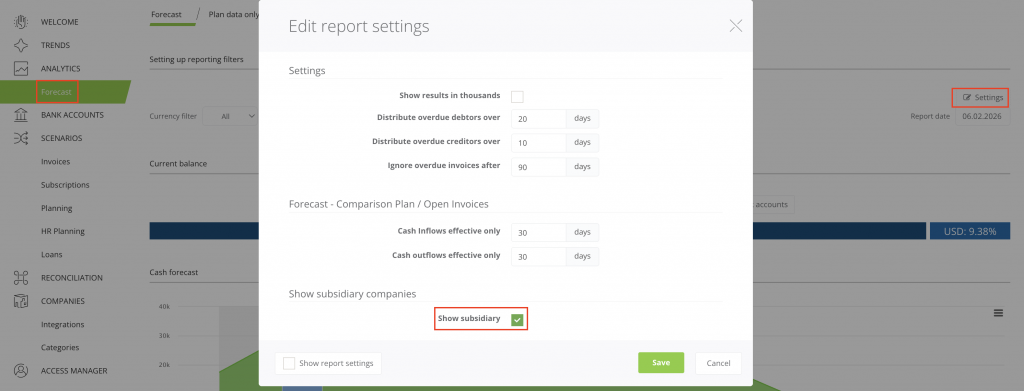
In instances where a parent company is associated with a subsidiary, users will be able to view the subsidiary’s payments if the “Show subsidiaries” option is enabled on the “Liquidity Forecast” screen.
To collect payments for a specific company, choose a company from the Companies list at the top of the screen and then use the reconciliation screen ‘Settings’ option to customize how payment events should be collected for the selected company.

How to use Settings
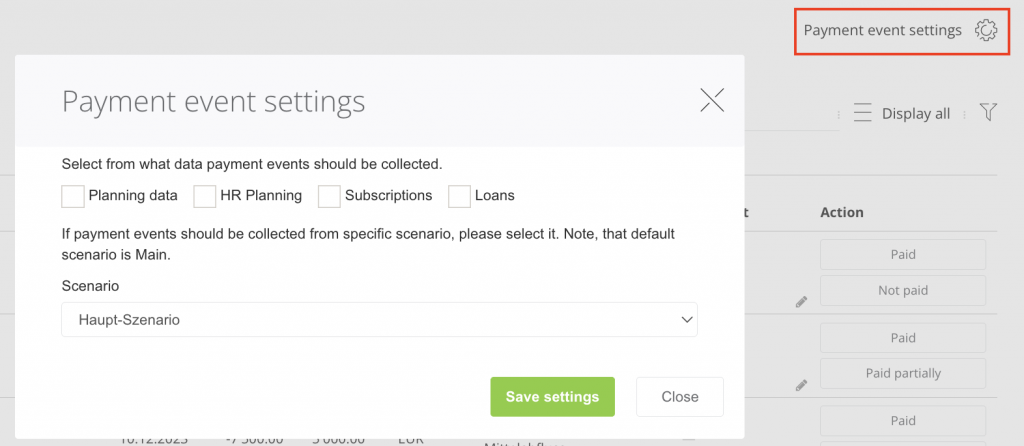
Reconciliation screen settings enable users to choose from which source the payments events should be collected from. When the ‘Planning Data’ option is selected, it additionally provides the user with the choice to retrieve payments for a specific scenario from a list of available scenarios.
What happens if a payment’s due date is missed:
Should you come across a payment that hasn’t been settled during your payment review, for example a payment date postponed by 10 days, you can directly update its ‘Event date’ to the new date in the reconciliation screen. This payment will then be taken into consideration on the Liquidity Forecast screen. Once the payment is made, you can then mark it as ‘Paid’ on the Reconciliation screen.
How to use reconciliation view
The reconciliation screen shows ‘Only unpaid’ and ‘Show all data view’ showing by default.
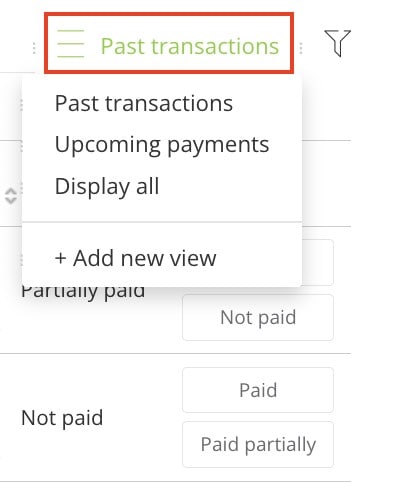
You can also use system filters or create your own view.
To create a new view click on ‘+Add new view’ and give your new view a unique name. Tick the ‘Visibility’ checkboxes to include those columns in the view as required, and further refine the results displayed in each active column by adding customised filters. Find out more here.
How to activate the reconciliation
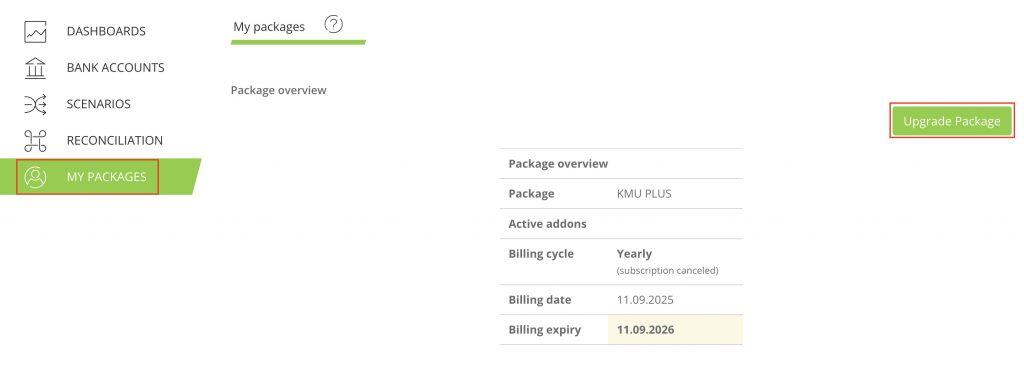
The Reconciliation module is available from the SME Plan and not available for STARTER or DEMO. If you would like to upgrade your plan, please use the Uprage Package Button in My Packages.